

The standard tool of macro photography is a Macro lens. But a lot of us can’t afford a dedicated macro lens due to high expense. A reversing ring is an easy solution. But the major disadvantage of using a reversing ring is that, you have no control on aperture. You have to set the aperture manually or use third party device to make it work. And in macro photography a hair movement of the lens while setting the aperture can make the image out of focus.
While trying various method to achieve good magnification once I suddenly discovered that if I remove the front element of zoom lens like 18-55 mm or 28-80 mm, it becomes a macro zoom lens. The magnification is high enough to do a lot of close up work. And you will have full control electronic control on aperture. Although they are unlikely to generate outstanding result but its always fun to do something new.
*One word of caution – It will void your warranty, so do it at your own risk.
 Remove the rubber grip of the zoom ring.
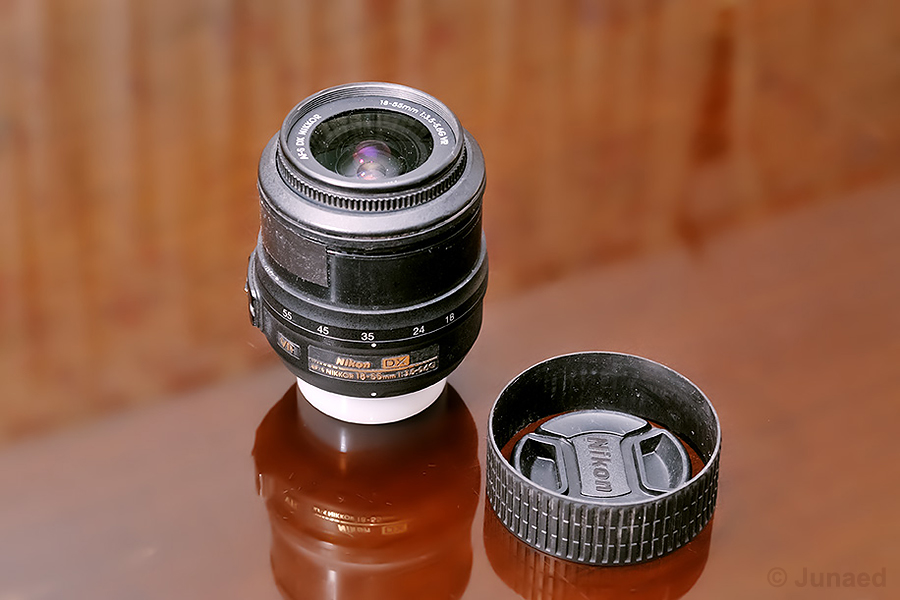 Remove the tape that hold together the two parts of plastic zoom barrel.
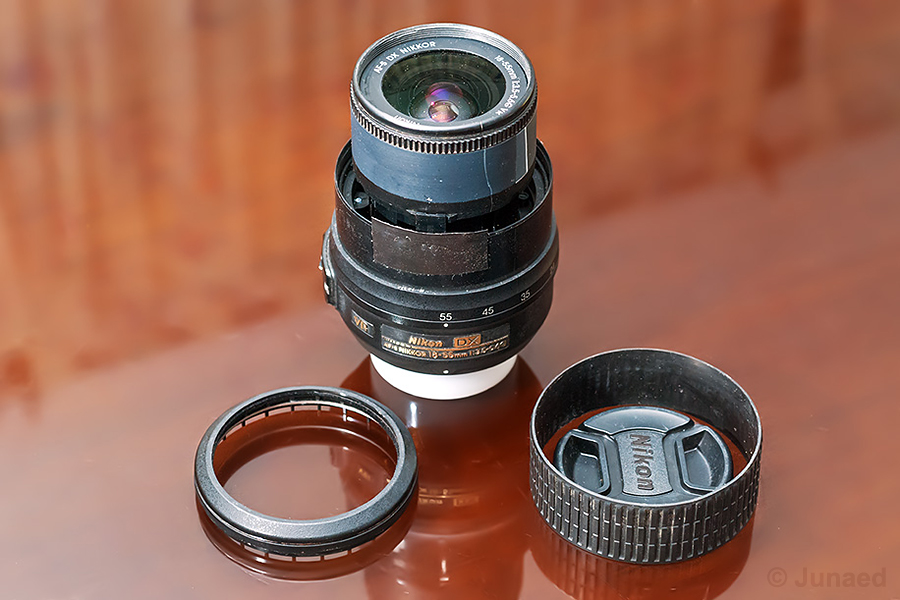 Now you will see two plastic clamps holding the front part of the lens. Gently release the front part of the lens from plastic clamps. Remember at which position they were. Because if you want to restore the lens you have to reattach the front part in right position, otherwise you will have focusing problem.
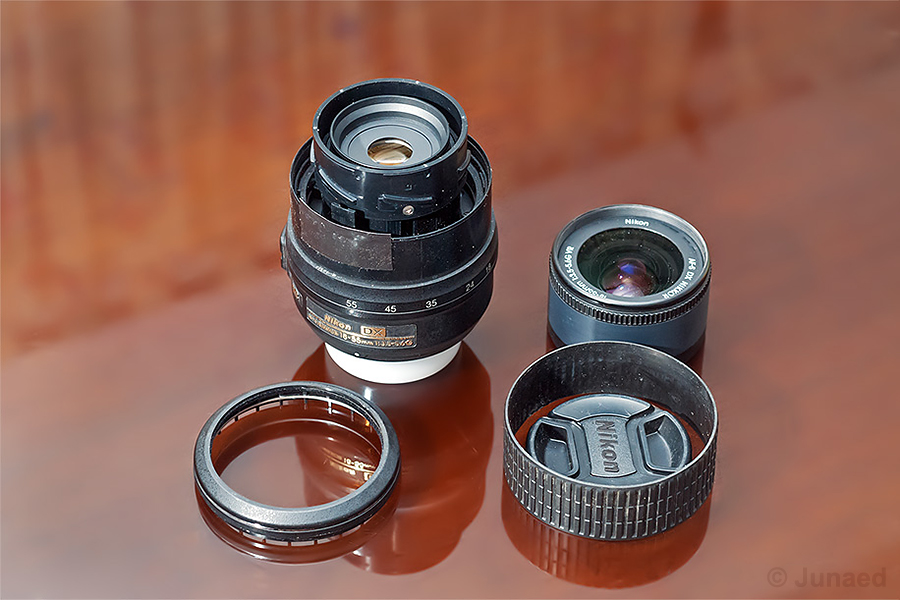
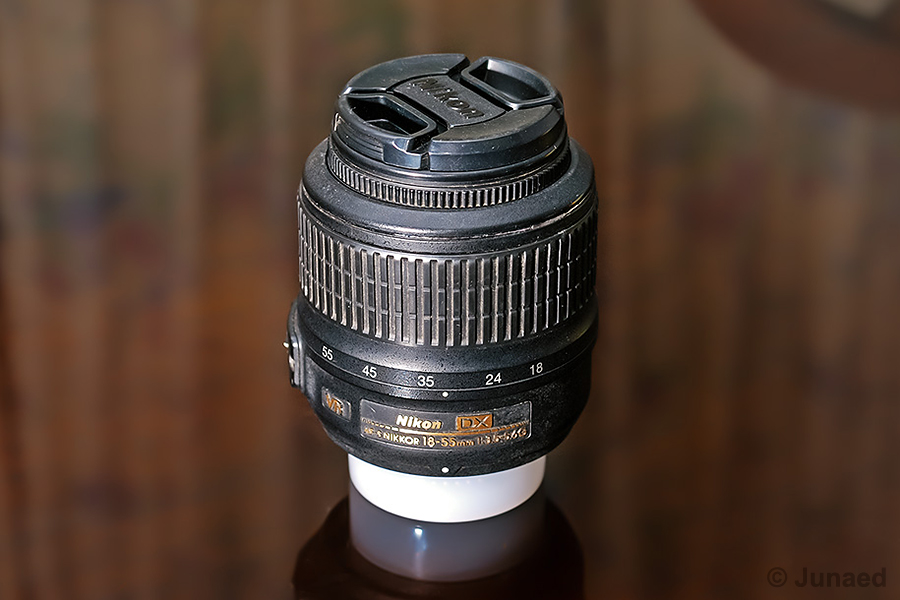
 Now reattach the plastic barrel together along with the rubber grip and you will have something like this.
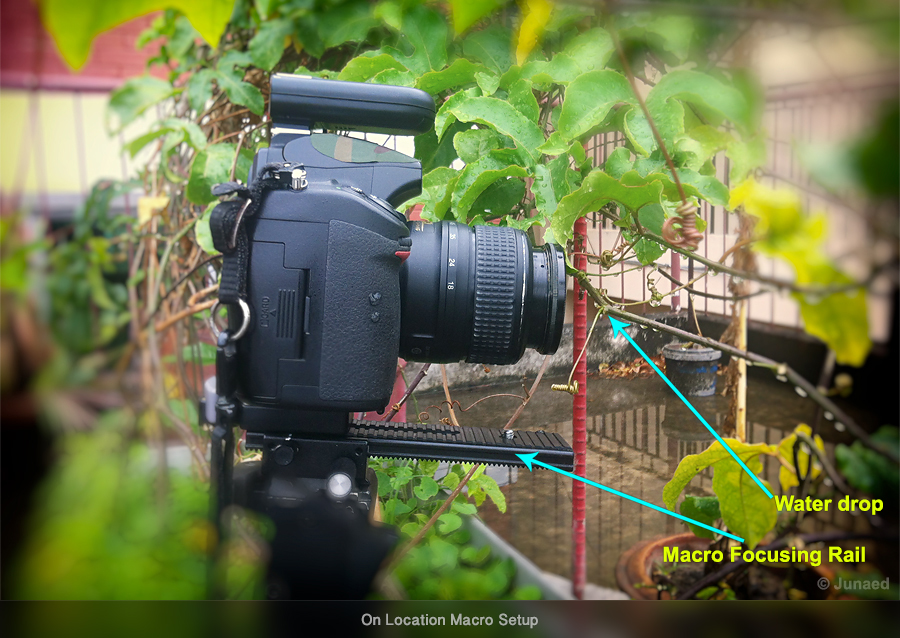
 Its done. Attach the lens to your camera and see how it looks. The magnification can be changed by rotating the Zoom ring. Remember you have to move forwards or backward towards the subject to get the right focus. You can use a macro focusing rail for that purpose. With the setup complete now you have full aperture control.
A Video Tutorial with Nikon 28-80 Kit Lens
ProsIts pretty cheap setup
Auto Aperture control
High Magnification more than 2X
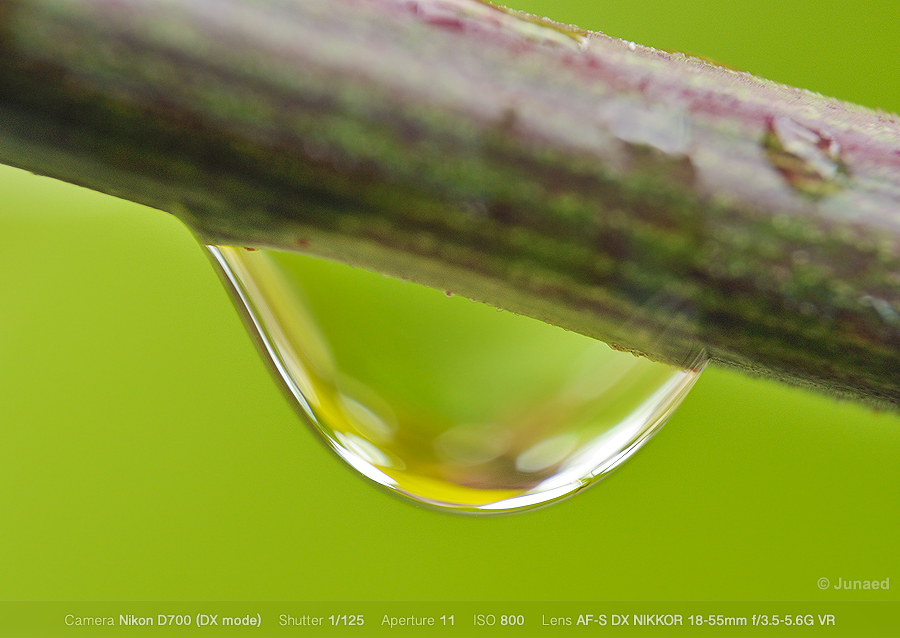
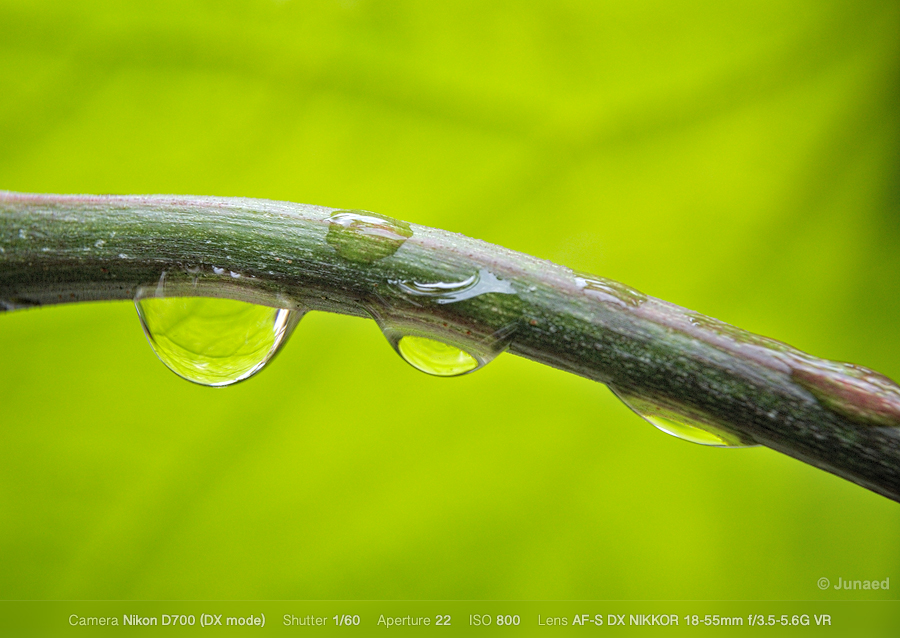
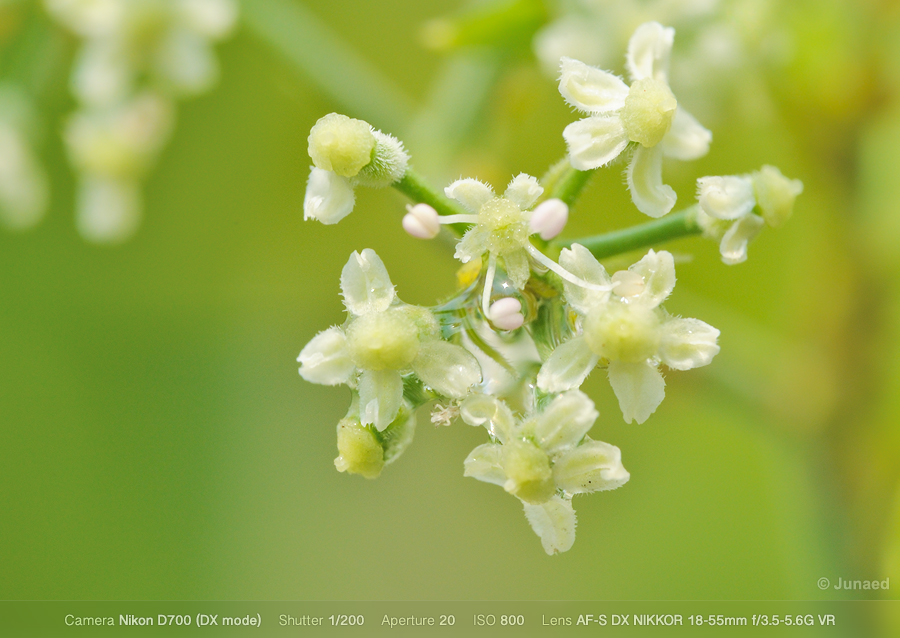
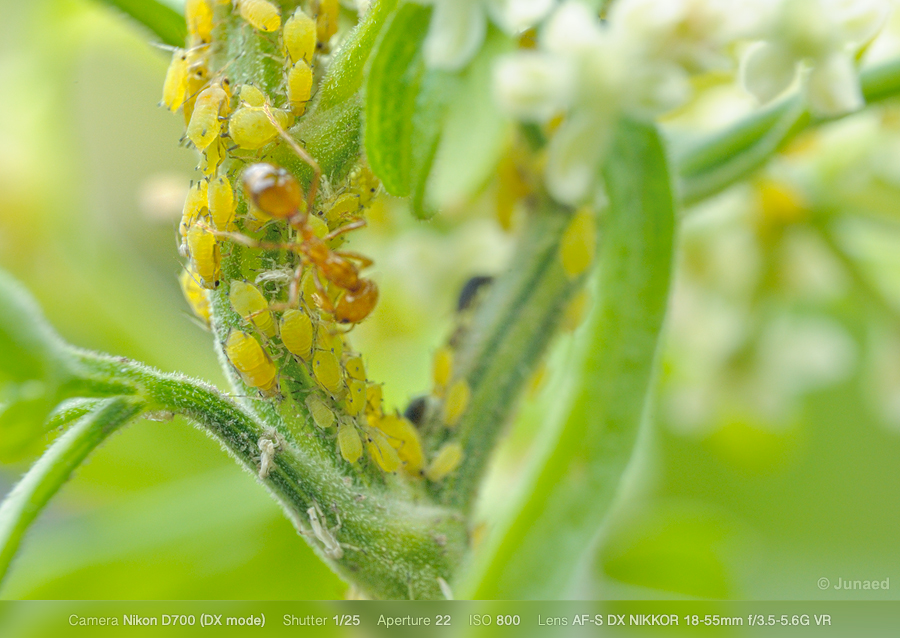
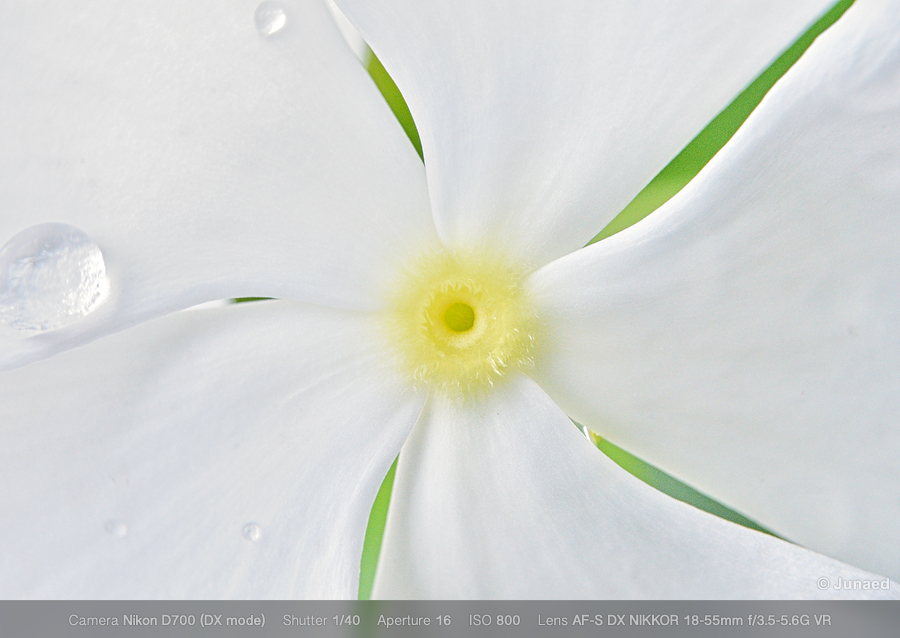
Image quality reasonably good at high magnification – look at the example & judge yourself
Auto Aperture control
High Magnification more than 2X
Image quality reasonably good at high magnification – look at the example & judge yourself
Cons
There is distortion & lack of sharpness at the corners
Focusing needs to be precise to get better result (I used a macro focusing rail & manual focusing)
There is distortion & lack of sharpness at the corners
Focusing needs to be precise to get better result (I used a macro focusing rail & manual focusing)
Working Distance
At 18mm free working distance in front of the lens is – 2.5 cm
At 55mm free working distance in front of the lens is – 3 cm
At 18mm free working distance in front of the lens is – 2.5 cm
At 55mm free working distance in front of the lens is – 3 cm
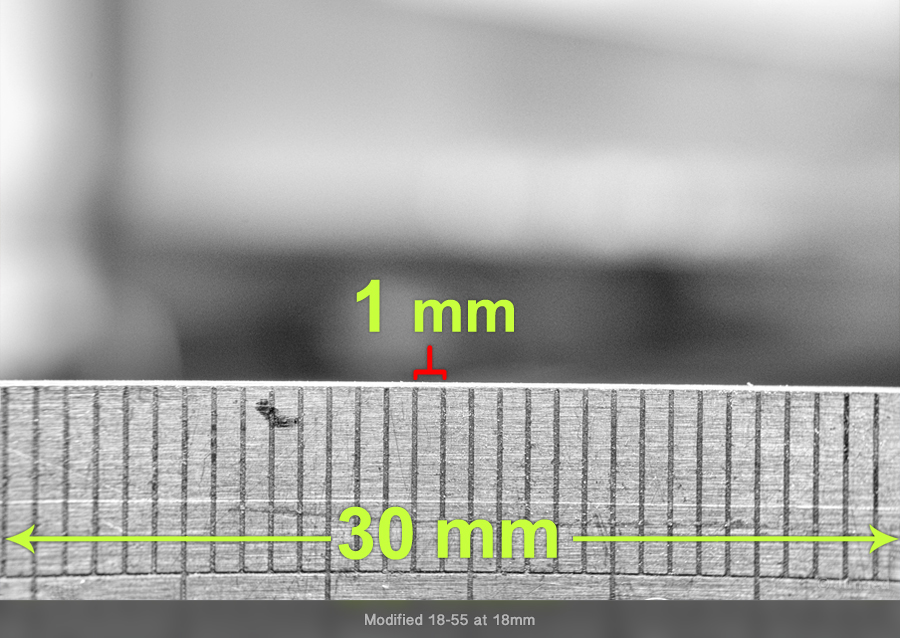
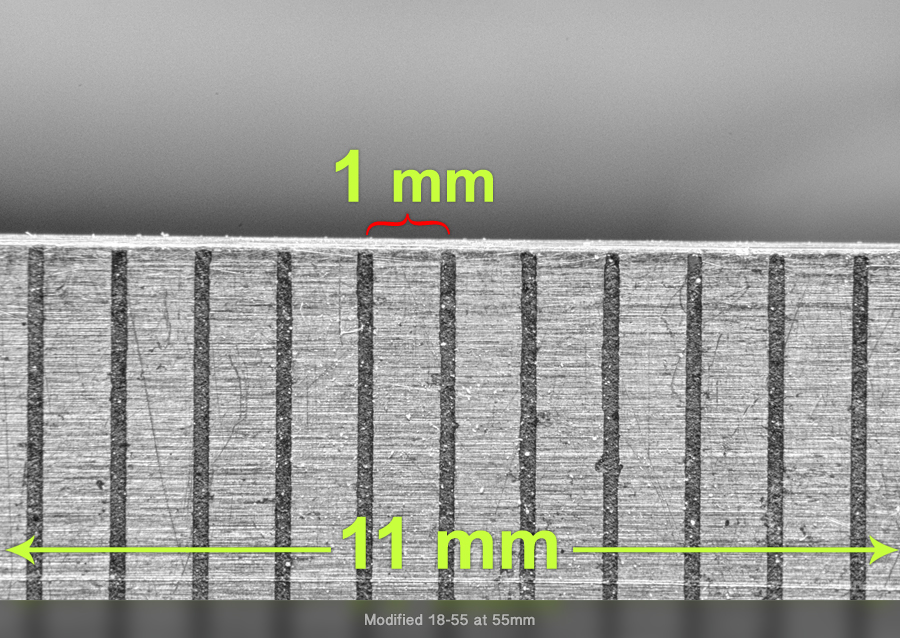
Magnification
At 18mm focal length you can take an image of 30 mm object
At 55 mm focal length you can take an image of 11 mm object.
Following two images shows how it looks at various focal length
At 18mm focal length you can take an image of 30 mm object
At 55 mm focal length you can take an image of 11 mm object.
Following two images shows how it looks at various focal length
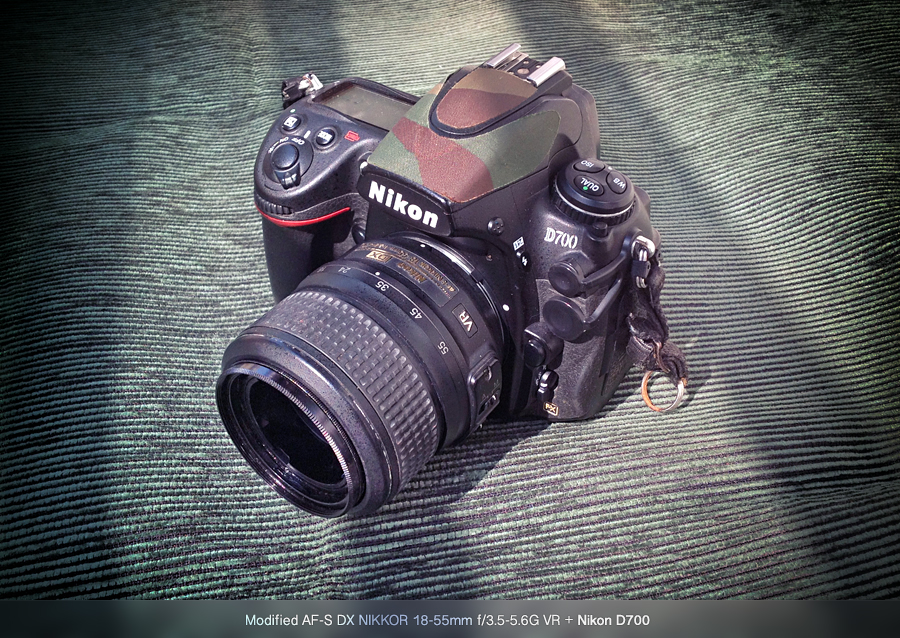
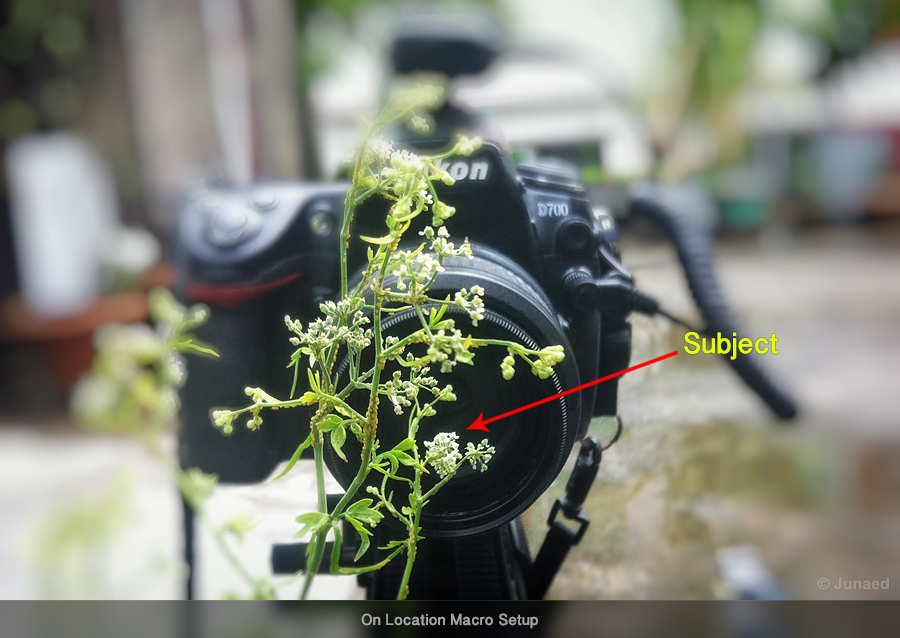
Now here is my setup with Nikon D700 camera
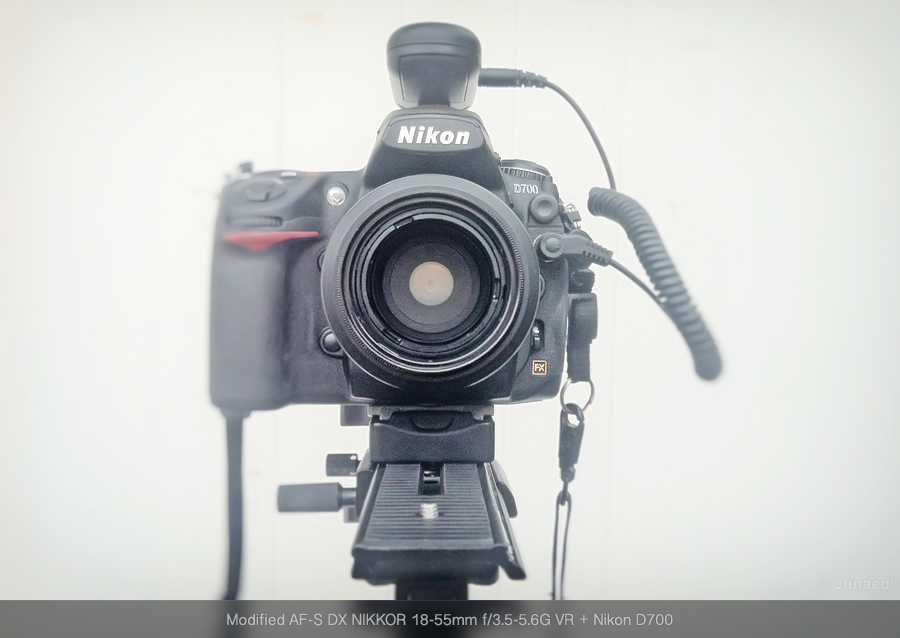
ExampleAll the images taken with Nikon D700 in DX crop mode
The images also shows my on location setup
The images also shows my on location setup

Conclusion
The Whole setup is quite small and convenient to use. With fully functional Auto aperture you don’t have to worry about focus shift, which is a common problem with reversing ring. A good tripod and cable release is recommended for getting good result. The day I shoot the images was quite windy and rainy, so I used high ISO to get reasonable shutter speed. Otherwise I prefer to keep the ISO as low as possible to get smooth and rich color and tone. To minimise vibration I used mirror lock up and wireless trigger. Live view is quite helpful to get the focus right. As these kit lens are really cheap compared to a dedicated macro lens this setup will help a lot of young starter to get the taste of high magnification macro photography.
The Whole setup is quite small and convenient to use. With fully functional Auto aperture you don’t have to worry about focus shift, which is a common problem with reversing ring. A good tripod and cable release is recommended for getting good result. The day I shoot the images was quite windy and rainy, so I used high ISO to get reasonable shutter speed. Otherwise I prefer to keep the ISO as low as possible to get smooth and rich color and tone. To minimise vibration I used mirror lock up and wireless trigger. Live view is quite helpful to get the focus right. As these kit lens are really cheap compared to a dedicated macro lens this setup will help a lot of young starter to get the taste of high magnification macro photography.
No comments: